We just finished applying a hot lime wash to our ‘Ty Twt‘ building in Wales. Here you can see the finished building.
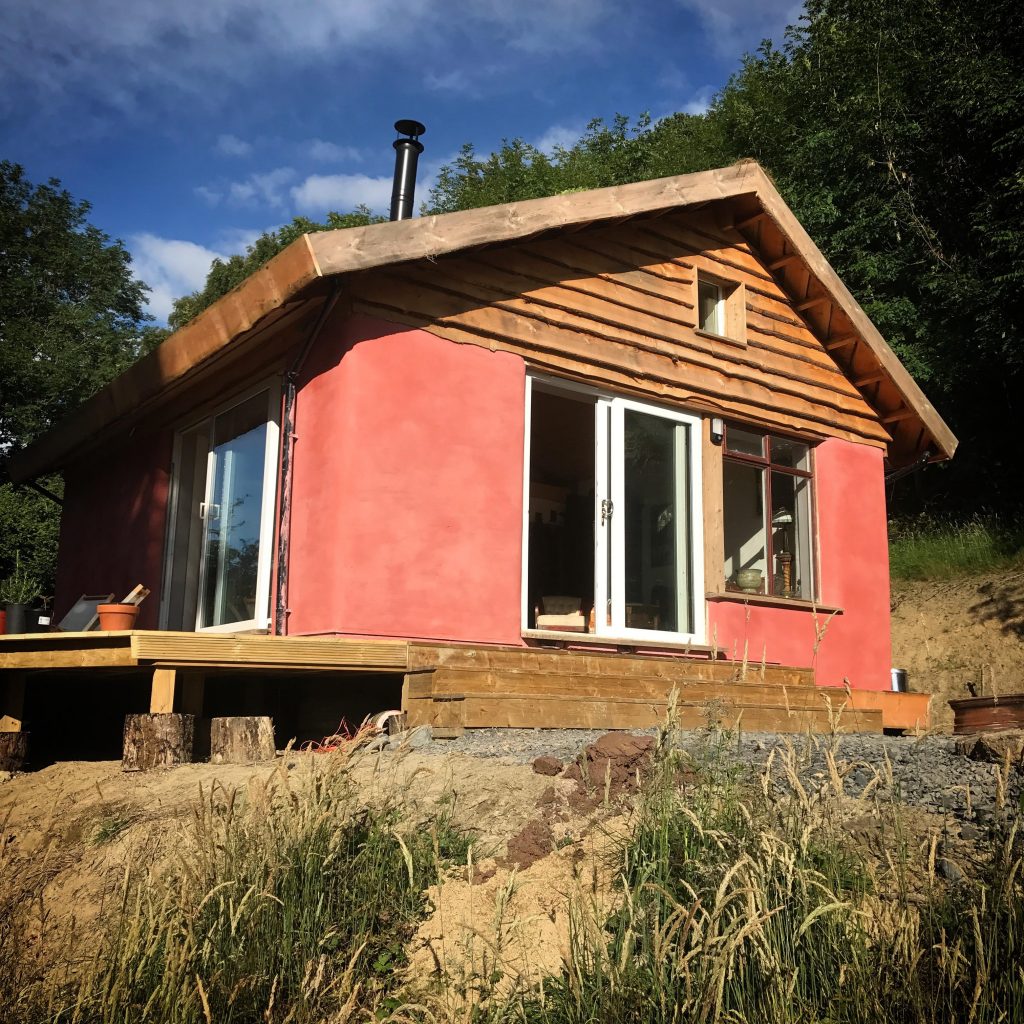
Ty Twt is a load bearing straw bale house completed by my company, Hartwyn using our intern building model. The house was completed in 11 weeks in 2016, with a final weekend to finish up the lime and green roof just completed in July 2017.
Our external render build up:
- Reveal / base coat – Clay slip rubbed into the straw bales.
This coat ‘reveals’ the gaps in the straw bale walls (as straw bales are not perfect cuboids). It also gets clay slip into the bale which means future clay coats have something to stick to (clay sticks to clay – just think of your boots after walk in clay rich damp mud!). Our clay slip comes from our site subsoil. - Stuffing – Dry straw stuffed into any holes that the base coat has revealed.
We are using dry straw here as it’s a better insulator than a clay/straw mix - Matrix coat – A clay / straw mix worked into the wall surface.
This straw rich coat unifies all the bales and stuffing into one surface, knitted together with the straw. The purpose of this coat is to even out any tensions in the subsequent plaster coats created by the joints in bales. By using this coat we avoid the use of mesh in our body coat. - Body coat – Lime stabilised earth plaster.
This is our clay rich subsoil, mixed with sand and straw to create an earth plaster. We add 5% lime to the mix for two reasons.
1 – Adding a small amount of lime to the earth plaster stabalises the clay in the mix. This means that if the render gets wet, the clay will not slump.
2 – We are adding lime into the plaster which means our next coat of lime wash isn’t the only lime in the render. Just as clay is attracted to clay, lime is attracted to lime. So having some lime in the base coat increases the adhesion between coats. - Lime Wash – Multiple coats of lime, diluted in water with added pigment. Details of application process are below.
– Lime water – 1 coat – To penetrate deeply and provide chemical attraction for future coats
This is a very thin dilution of lime to water, roughly 1:10 ratio.
– Lime putty lime wash – 2 coats – because lime putty has been slaked for much longer it’s a much finer solution, so penetrates further than the hot lime mix. This gives more strength to the limewash.
– Hot lime wash (pigmented)- 3 coats – This final coat is the thickest, and can be very similar to conventional store bought paint.
Why not just use lime on the exterior of a straw bale house?
It is possible to only use lime in the render build-up. By using a lime putty (fatlime) in the reveal coat, then straight to lime render and finishing with lime wash. This produces a great finish that is durable and perfect for a straw bale home (and many other types of home). For me, a large issue is with the initial reveal coat. This coat needs a lot of rubbing into the bales, and this means a lot of lime gets flicked around. Lime is caustic so getting any in your eyes or on your skin can be nasty, so limiting this key for safety.
The main reason we chose to use much more clay in our build-up is that lime is expensive, both in terms of money, and environmental impact. To create lime renders, limestone must be burned in a kiln, using a lot of energy. We were lucky to have a clay rich site, therefore the most environmentally suitable render comes from the local resources. Adding the lime at the final stages of the render build-up allows us to still have a durable, long lasting finish, but using only a fraction of the lime.
What is a lime wash?
Limewash is a simple type of matt paint made from lime and water, with or without additives. It has been used for centuries as a protective and decorative layer. We are using it to provide a waterproof, yet ‘breathable’ finish to our straw bale wall. It’s also the layer where we add the colour to the exterior.
The lime cycle
To fully understand our lime washing process, it’s good to have a small understanding of the lime cycle.
Calcium carbonate (limestone), once it has been burned and then slaked with water becomes a malleable product that we can add to sand to create plasters or mortars. The lime in these plasters or mortars then carbonates, or sets, and turns back into calcium carbonate. It never ceases to make me marvel that we are essentially liquefying limestone, to smear it on a building, and letting it turn back to limestone again. It’s as if we had taken a thin slice of the solid rock and stuck it to our building!

The two common forms you can buy lime for building are Lime putty and Hydrated lime. Lime putty is usually the lime of choice, this is because the longer it sits in an excess of water, the finer the putty becomes.
Quicklime is a volatile substance that wants to react with water. The reaction produces a lot of heat and can be dangerous if not properly controlled. It should, therefore, be undertaken only by those who know what they are doing!
How to make lime wash from lime putty?
To make a simple limewash from lime putty just needs lime putty and water. Watering down and whisking the putty to a milk like consistency. You can also add pigment at this stage.
Lime wash made from putty takes many coats to build up a strong colour – Don’t try to shortcut the limewash process by making your putty limewash thicker. Thicker limewash could crack, and is more likely to be dusty.
What is hot lime?
Hot lime is a term used to describe the creation of lime mortars, renders or limewashes straight from quicklime (CaO). This is becoming more common practice, certainly in the UK, and is believed to be how plasters, mortars, and lime washes would have been produced in the past. The ‘Hot’ refers to the heat given out by the reaction of quicklime and water. This can be extremely hot and I have heard tales of people setting buckets on fire!
Why use a hot lime wash?
The two main reasons we wanted to use a hot lime wash were:
- The colour that can be achieved by adding pigment during a hot lime reaction is much stronger than the colour that can be achieved by adding the pigment to a lime putty.
- You can create a much thicker lime wash with hot lime, that will not crack or dust. This means we can be done in fewer passes of the building.

How to make hot lime wash

Disclaimer: This process can be dangerous and should be performed by people who know what they are doing. Please make sure you wear all the correct PPE and have the relevant first aid and eye wash to hand. The reaction will get hot and create steam, possibly spitting. So anyone in the area should also be wearing the correct PPE. Quicklime is very volatile and wants to react with moisture, so if it touches your skin it can burn you very badly, worse the eyes. Please stay safe!
- Combine quicklime and pigment (if desired) in a dry metal container – We used 10% pigment to dry lime by weight. You can add up to 20% of Ochers and Natural Pigments by weight. Manufactured Oxide Pigments: 3% to 15% of the weight of the dry lime.
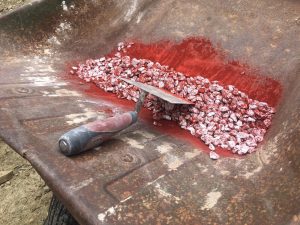
- In a controlled fashion add water to the mix, the quicklime will start to react and create steam. The aim here is to add enough water to keep the reaction happening, but not too much to drown it out prematurely. This will make a lot of steam and could spit, so protect yourself! The mixture will grow in size, so make sure your container is large enough.
- Once the reaction has finished and cooled, you can transfer to a larger mixing vessel.

- Mix thoroughly using a paint mixer, and strain the concentrated mixture through a metal sieve
- Add enough water to create a workable paint.
- Test the thickness of your mix on a hidden bit of wall or similar material. Let it carbonate slowly (keep it misted) and check for cracking when dried. cracking will happen if it’s too thick.
How to apply lime wash to a wall
The hardest part to limewashing is ensuring that your lime carbonates slowly. If the lime dries out very quickly, you will have a dusty and weak finish. Therefore it’s essential to understand and control the suction of your wall. Our lime stabalised clay wall was very thirsty, so we made many passes around the building misting the walls. With each pass we observed how quickly it was being pulled into the wall.
Factors like wind and sun play a large role. Any wall that faces the sun or the wind will dry out much quicker than one without. To control this we drape hessian around the building and keep that misted down too, as well as misting down those sides more. Equally, if direct rain hits the wall before carbonation has occurred, the lime will wash out and create visible streaks.
Ideally, you want the limewash to have as long as possible to carbonate. So summer limewashing can be tricky to manage. However, you don’t want the lime to freeze for a few months. This can delaminate the lime. So winter limewashing is not really possible (in the UK climate at least).
- Apply the limewash with natural bristle brush, with even application, in criss-cross strokes. Try to keep the leading edge wet.
- Once the surface appears matt, the surface is burnished with a sythetic bristled brush. Wallpaper brushes are great for this as they have large heads.
- Keep the wall misted, but avoid over wetting. Avoid water is running down the wall.


Excellent, clear information. Thanks
Nice One.
Has anyone heard of adding sand to the lime coats to help them adhere to eachother better, or is limewash to limewash a strong enough bond ?
p.s once I heard that limewashes with linseed oil may not adhere to eachother as much as plain limewash.
These questions are assuming a purpose for limewash that is essentially to build up layers like a sealant, and not the theory of moisture ejecting layers where the layers are of decreasing porosity size yet increasing amount of pores theory that carries moisture from the substrate layer out to the top layer by capillary action or whatever the phenomenon of water moving from a larger space to a smaller space like up a larger tree root pipe and up then out the smaller pipe of the stomata of the tree leaves into the air by evaporation is called.
Aaaaaah, at last the mystery of using lime has been explained. VMT!